User Guide
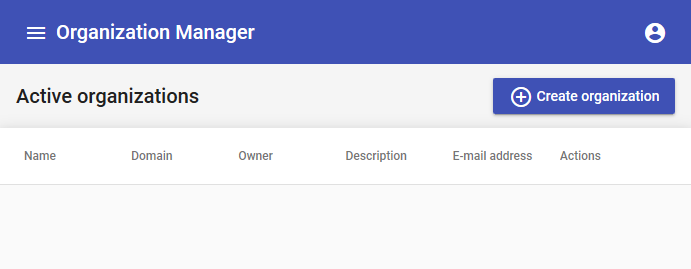
After signing in, you will be brought to the list of active organizations. Unless you have administrator rights, you will only see organizations that you are part of. Administrators also have access to a Create organization button in the top-right corner, to create new organizations.
Upon clicking it, a form will pop up, with required fields marked by an asterisk. The domain field is not required and will be generated automatically when left blank, based on the organization’s name.
The owner’s e-mail address, name and surname must match the equivalent fields of a user registered in the identity provider, AAC.
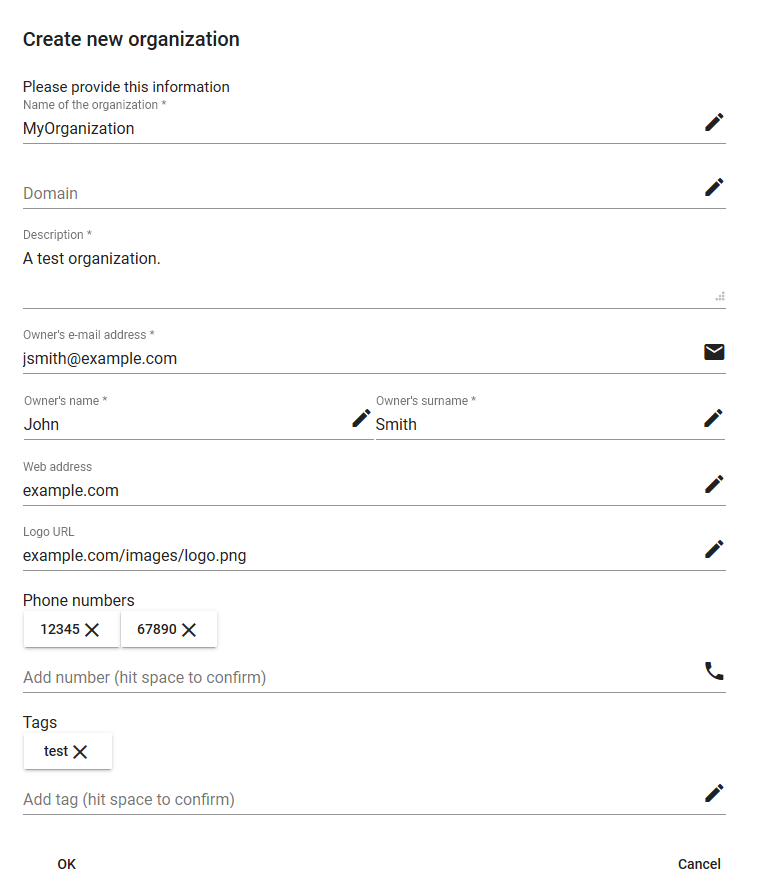
Once you click OK, the page will refresh and, if creation was successful, the new organization will appear on the list. If something went wrong, an error will be displayed instead.
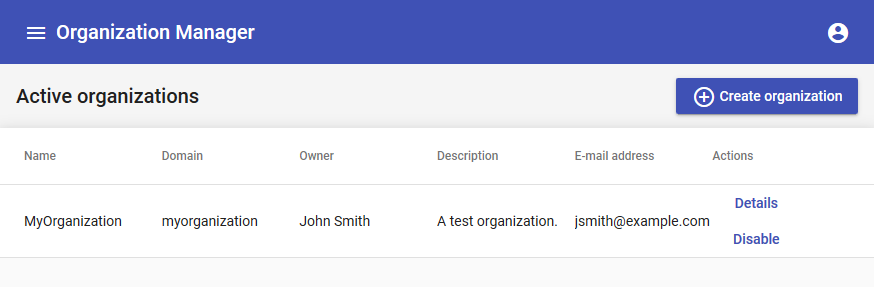
Next to the organization’s basic information are the Details and Disable actions. Disable will only be available if you have administrator rights.
If you click on Details, you will be brought to a page containing the organization’s information. If you’re registered as owner of the organization, or if you have administrator’s rights, the Edit organization information button allows you to change some fields.
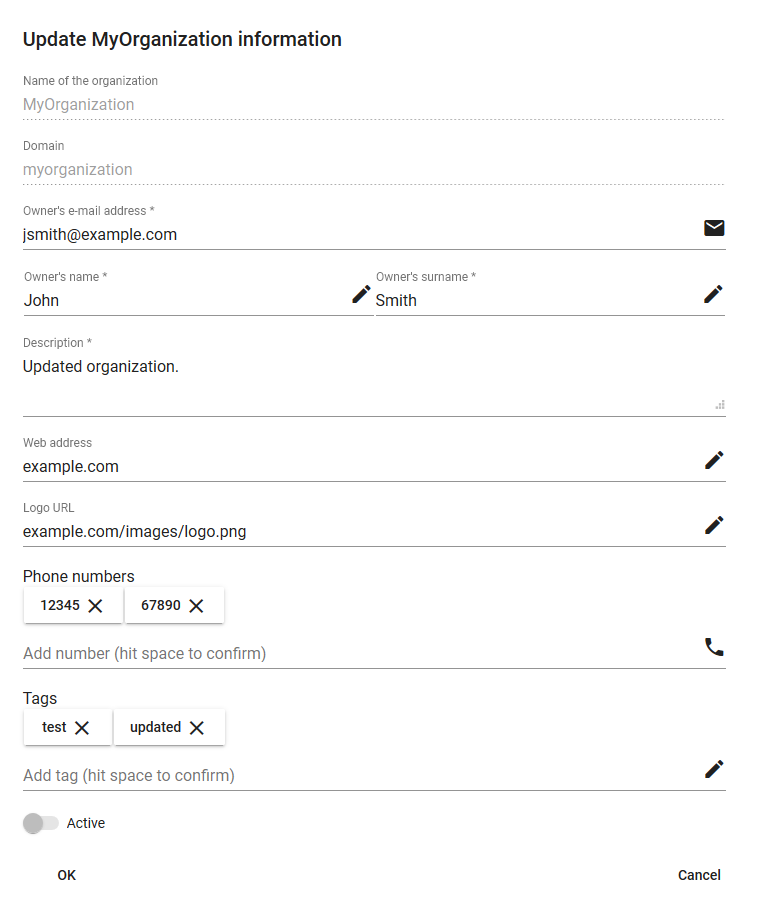
Only the following information can be changed: owner’s data, description, web address, logo, phone numbers and tags.
The Configuration tab is only available to owners of the organization and administrators and displays all tenants of the organization, grouped by the components they are assigned to. Administrators may add tenants by clicking on the Manage components button.
A menu will pop up listing all available components. When you click on a component, it will expand, and you will be able to create new tenants by clicking on Add tenant and typing the tenant’s domain.

Once you are done creating tenants, click OK. The page will refresh and components that have tenants will appear. By clicking on a component, you can see its tenants.
Renaming and deleting tenants works similarly: click on Manage components, expand a component and rename its tenants or delete them with the Delete button.
The Users tab can be viewed by owners of the organization and administrators and lists the organization’s members. It allows adding new members to the organization, assigning or revoking roles and removing users from the organization.
If the organization has just been created, the only user will be its owner.
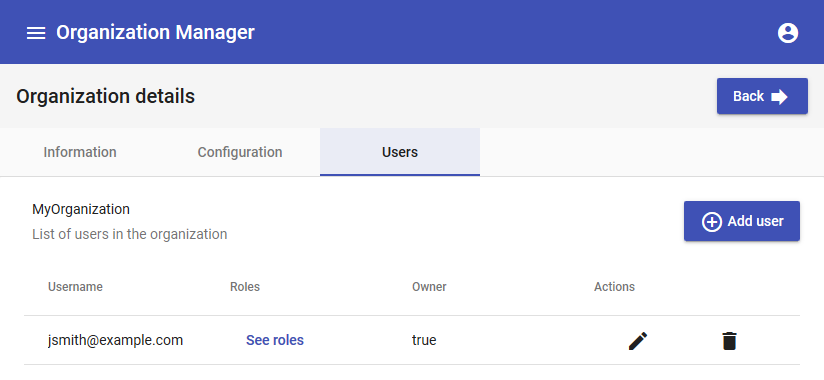
You can add more users by clicking on the Add user button. A small menu will appear, where you will be able to insert the user name and assign roles to the new user.
Administrators may decide if the new user is to be registered as owner of the organization, by toggling the Owner switch.
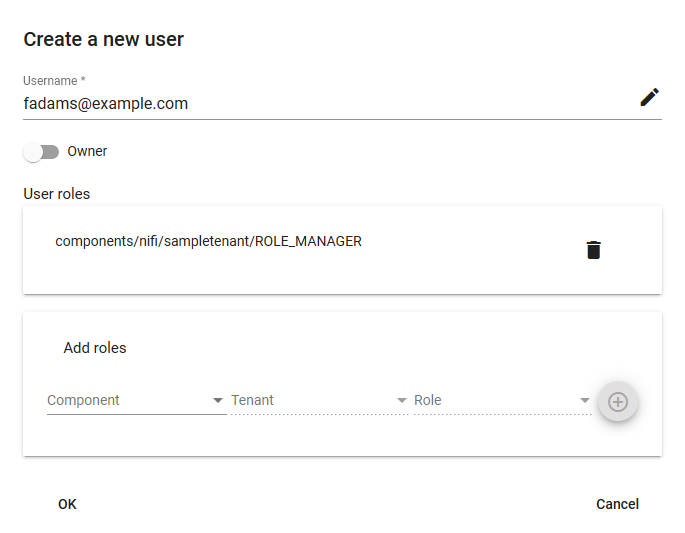
After you click OK, the page will refresh and the new user will appear.
You can remove users from the organization by clicking on the trashcan icon.
To assign (or revoke) roles, click on the pencil button. A menu similar to the previous one will appear.
Only administrators may delete organizations. If you want to delete an organization, it must first be disabled.
Go to the list of organizations (click Back in the top right, or click on the menu button in the top left, next to Organization Manager, and pick Active Organizations), click Disable on the organization you want to delete and confirm. The organization will disappear from the list, but has not been deleted yet. Click on the menu button in the top left and pick the second option to retrieve the list of disabled organizations. You can delete an organization from here, by clicking on the trashcan icon.